Can You Use Acrylic Paint on Walls?
You’re considering using acrylic paint on your walls, but you’re unsure if it’s the right choice. You’ve heard it’s a versatile and vibrant medium, but can it really hold up on a large surface like a wall?
So, what’s the first step in getting started?
Key Takeaways
- Acrylic paint can be used on walls, but it’s essential to prepare the surface properly with a primer and gesso for optimal adhesion.
- Acrylic paint forms a strong, long-lasting bond with the wall, resisting minor scratches and wear, and is flexible and durable.
- Apply acrylic paint in thin, even coats, allowing each layer to dry completely before adding additional layers or details to prevent streaks and drips.
- Priming is necessary if working with new, unpainted drywall or a surface previously painted with a dark color to ensure proper paint adhesion.
Recommended Posts
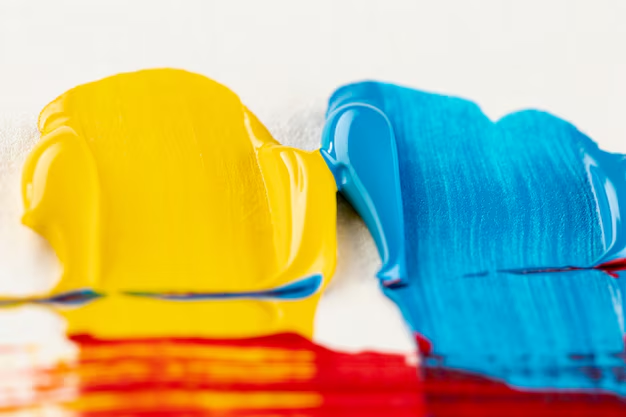
What is Acrylic Paint?

Acrylic paint is a fast-drying, water-soluble paint made from a mixture of water, pigment, binder, and other additives.
The binder, usually an acrylic polymer, holds the pigment particles together, adhering them to your walls. This unique blend of ingredients allows acrylic paint to be flexible, durable, and resistant to fading.
When applied to your walls, acrylic paint forms a strong, long-lasting bond that can withstand minor scratches and wear.
I recommend Liquitex Acrylics. Its water-soluble nature makes it easy to clean up and mix with other mediums, giving you creative freedom to experiment with different techniques and effects.
Can You Use Acrylic Paint on Walls? And, How Do You Prepare Walls for Acrylic Paint?
Since acrylic paint is a versatile medium, it’s natural to wonder if it can be used directly on your walls, and the answer is yes, but with some preparation.
First, you need to get your walls ready.
Before you start painting, make sure your walls are clean and dry.
Remove any dirt, grime, or old adhesive residue that might affect the paint’s adhesion.
If you’re painting over a dark or bold color, give your walls a coat of primer to guarantee the acrylic paint adheres evenly.
You should also fix any holes or cracks with sparkling compound and sand them smooth.
Next, lightly sand your walls to create a rough surface for the paint to grip. This step is vital, as acrylic paint can peel off if the surface is too smooth. Micro Detail Sander Paper Kit is a good place to start.
How to Use Acrylic Paint on Walls?

Prepare the wall:
Clean the wall thoroughly with soap and water to remove dirt, grime, or grease.
Fix any holes or cracks with sparkling compound and sand smooth.
Remove any switch plates, outlet covers, and doorknobs.
Tape off the area:
Apply painter’s tape along the edges of the areas you don’t want to paint, such as baseboards, trim, and moldings.
Apply a thin layer of painter’s caulk around windows and doors to ensure a seal.
Prime the wall (optional):
If the wall has a glossy finish or has never been painted before, apply a coat of gesso or acrylic primer to create a surface for the paint to adhere to.
Allow the primer to dry completely before proceeding.
Mix the paint:
Acrylic paint can be mixed with a range of mediums to achieve different effects, such as glazes, textures, or matte finishes.
Start with a small amount of paint and mix it with the desired medium according to the manufacturer’s instructions.
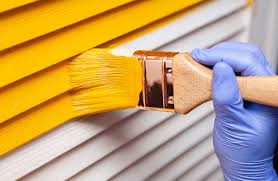
Apply the paint:
Use a high-quality paintbrush or roller to apply the paint to the wall in thin, even layers.
Work in small sections, about 4 feet by 4 feet, to maintain even coverage.
Use gentle, sweeping strokes to blend the paint and minimize brushstrokes.
Allow the paint to dry:
Let the first layer dry completely, according to the manufacturer’s instructions, before applying additional coats.
Acrylic paint typically dries quickly, within 15-30 minutes.
Apply additional coats:
If the first layer does not provide adequate coverage, repeat steps 5 and 6 until the desired color is achieved.
Remove the tape:
After the final layer of paint is dry, remove the tape and caulk from the edges and trim.
Touch up:
If there are any areas where the paint may have seeped under the tape, use a small brush to touch up the edges.
That’s it guys! it’s really straight forward.
Do I need to Prime Walls First Before Applying Acrylic Paint?
If you’re working with a new, unpainted drywall or a surface that’s been previously painted with a dark color, priming is a must.
I personally love U.S. Art Supply White Gesso Acrylic Medium. This primer will help create a uniform base for your acrylic paint, ensuring it adheres properly and reducing the risk of uneven color.
Additionally, if you’re dealing with a porous or textured surface, priming will help to create a smooth canvas for your art.
If you’re working with a surface that’s already been primed or painted with a light color, you might be able to get away without priming.
However, it’s still important to clean the surface thoroughly to remove any dirt, grime, or oils that could affect paint adhesion.
Take the time to assess your surface and make an informed decision about priming. Remember, a little extra effort upfront can make all the difference in achieving a professional-looking finish that you’ll be proud to showcase.
How to Seal Acrylic Paint on a Wall?
You’ll want to apply a clear coat of varnish or sealant to protect your acrylic paint and guarantee it remains vibrant and intact over time.
This step is vital, as it shields your artwork from fading, chipping, or peeling. When choosing a sealant, opt for a water-based or acrylic-specific varnish, as they’re designed to work harmoniously with your paint.
I vouch for Mod Podge Gloss. Make sure to read the instructions and follow the recommended application process.
Before applying the sealant, confirm your paint is completely dry. You can speed up the process by using a fan or working in a well-ventilated area.
Once dry, gently sand the surface to create a smooth finish. Then, apply the sealant using a high-quality brush or roller, working in thin, even layers.
Allow each layer to dry according to the manufacturer’s instructions before adding additional coats.
Does Acrylic Paint Crack on Walls?
Acrylic paint on walls can be prone to cracking if it’s not applied or sealed properly, which is why it’s so important to prime your surface and apply techniques .
You don’t want your beautiful artwork or design to be ruined by unsightly cracks. The good news is that with the right approach, you can minimize the risk of cracking.
When you apply acrylic paint to your walls, make sure the surface is clean, dry, and free of dust and oils.
If you’re using a primer, apply it evenly and allow it to dry completely before adding your paint.
Additionally, avoid using too much paint or applying it too thickly, as this can cause it to shrink and crack as it dries.
How Long Does Acrylic Wall Paint Last?
With proper application and maintenance, your acrylic wall paint can last for many years, even decades, without fading or deteriorating substantially.
You can expect the paint to remain vibrant and fresh-looking for a long time, which is great news for those who want to enjoy their creative expression without worrying about frequent touch-ups.
The lifespan of acrylic wall paint largely depends on the quality of the paint, surface preparation, and environmental factors.
If you use high-quality paint and follow the manufacturer’s instructions, you can expect it to last longer.
Additionally, if you keep your walls clean, avoid exposing them to direct sunlight, and maintain a stable temperature and humidity level, your paint job will last even longer.
On average, you can expect acrylic wall paint to last anywhere from 5 to 15 years before it starts to show signs of wear and tear.
By taking the necessary precautions and using high-quality materials, you can enjoy your beautiful, vibrant walls for years to come.
How Do You Preserve Acrylic Paint on Walls?
To keep your vibrant walls looking their best, it’s vital that you take these proactive steps to preserve the acrylic paint;
- Start by dusting your walls regularly to prevent dirt build-up, which can cause the paint to fade or become discolored.
- You can use a soft-bristled brush or a microfiber cloth to gently sweep away dust particles.
- Next, avoid exposing your walls to direct sunlight, as UV rays can cause the colors to fade.
- If possible, use window treatments like curtains or blinds to filter the sun’s rays.
- You should also avoid using harsh cleaning products, which can damage the paint or strip it of its vibrant colors.
- Instead, opt for mild soap and water or a specialized wall cleaner.
Tips & Tricks for Working with Acrylic Paint
These Five essential techniques will make all the difference in achieving professional-looking results when you’re working with acrylic paint;
- First, always prime your wall with a coat of gesso to create a smooth, non-porous surface. This guarantees better paint adhesion and prevents the paint from soaking into the wall.
- Next, use high-quality brushes designed specifically for acrylics, as they’ll help you achieve a smooth, even finish.
- When mixing colors, start with a small amount of paint and gradually add more as needed – you can always add more, but it’s harder to remove excess paint.
- To avoid streaks and marks, work in small sections, using gentle, sweeping strokes to blend the colors.
- Finally, don’t be afraid to experiment and take risks – acrylic paint is forgiving, and you can always correct mistakes or start over.
#1 BEST SELLER
Featured Product
Smallbudi Art Painting Bulk Supplies for Multi Surface
15 Colors Large Acrylic Paint Set (33.8 oz,1000 ml) – Smallbudi Art Painting Bulk Supplies for Multi Surface Canvas Wood Leather Fabric Rock Craft, Non Toxic Paint for Kid & Adult with Press Pump &

Conclusion
You’ve made it to the finish line!
Now that you’ve got the lowdown on using acrylic paint on walls, it’s time to get creative and make your mark.
Remember, with proper prep and technique, your masterpiece will be the icing on the cake.
So, don’t be afraid to think outside the box and get a little messy – after all, practice makes perfect!
Thanks for reading!