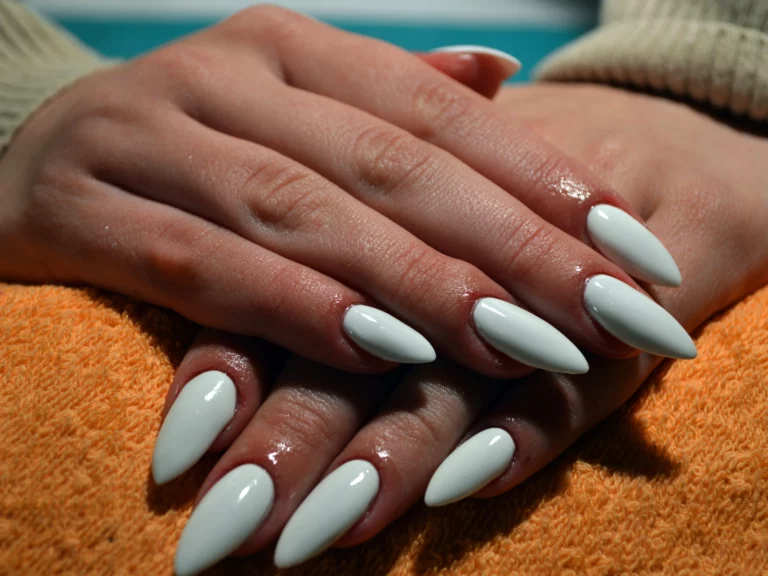
What Is Nail Primer for Acrylic Nails?
According to a study, a staggering 70% of nail applications fail due to inadequate preparation, highlighting the importance of a crucial step in the process.
A nail primer for acrylic nails is a special liquid applied to natural nails before applying acrylics, creating a surface for the acrylic to adhere to and ensuring a strong bond.
Today, you’ll learn the ins and outs of using a high-quality primer, avoiding common mistakes, and achieving long-lasting, salon-quality results.
Recommended Post: How to Know if You are Allergic to Acrylics?
What Is Acrylic Primer?
You probably know that acrylic nails require a special kind of glue to adhere to your natural nail, but what you mightn’t know is that primer plays a key role in ensuring that bond.
So, what’s acrylic primer? Simply put, it’s a special liquid applied to your natural nail before applying acrylics.
This liquid creates a surface for the acrylic to adhere to, allowing for a stronger and longer-lasting bond. Think of it like preparing a wall for paint – you need a smooth surface for the paint to stick properly.
In the same way, primer helps the acrylic stick to your nail, reducing the risk of lifting or separation.
What Does Acrylic Primer Do?
When you apply acrylic primer, it’s doing some vital behind-the-scenes work to get your nails ready for the acrylic application. Here are the perks of using acrylic nails;
1)Boosts PH
Your acrylic nail primer plays a pivotal role in preparing the nail surface for application, and one of its key functions is to boost the pH level.
This is essential because the natural pH level of your nails is slightly acidic, which can affect the adhesion of the acrylic.
When you apply the primer, it helps to neutralize the pH level, creating an ideal surface for the acrylic to bond to.
This guarantees a strong and long-lasting bond between the nail and the acrylic, reducing the risk of lifting or separation.
2)Improves Soothing
Acrylic primer takes the sting out of nail preparation by improving soothing.
You’ll appreciate how it calms your nails and surrounding skin, making the entire process more comfortable.
When you apply primer, it helps to neutralize any irritation or redness, allowing you to focus on achieving the perfect acrylic nail application.
As you prep your nails, you might notice that they can become sensitive or even painful. This is especially true if you have naturally sensitive skin or are prone to irritation.
The primer works to counteract these issues, ensuring that your nail bed and surrounding skin remain calm and relaxed.
This means you can enjoy a more pleasant experience, without worrying about discomfort or pain.
3)Drying
The primer’s drying properties help create an ideal surface for acrylic application.
When you apply the primer, it evaporates quickly, leaving behind a dry, tacky layer that allows the acrylic to bond seamlessly. This is especially important if you have naturally oily nails or if you’re using a particularly stubborn acrylic formula.
By drying the nail surface, the primer guarantees a strong, long-lasting bond between the nail and the acrylic. As you work with the acrylic, you’ll notice that it adheres more easily and evenly to the primed surface.
This reduces the risk of lifting or separation, which can be a major problem with acrylic nails. With a good primer, you can achieve a smooth, flawless finish that looks and feels amazing.
Plus, the drying properties help prevent air pockets from forming, which can weaken the bond and lead to premature lifting.
Can I Use Base Coat as a Primer?
Base coats and primers have different formulations and functions. Base coats are designed to protect your natural nail, providing a barrier between your nail and the polish or acrylic. They often contain moisturizing ingredients and can help with nail growth.
In contrast, nail primers are specifically designed to create a ideal surface for acrylic adhesion. They usually contain chemicals that help the acrylic bond to your nail, ensuring a long-lasting and durable application.
Using a base coat as a primer may lead to a weaker bond, resulting in lifting or chipping of the acrylic. So, while it might seem like a convenient shortcut, using a dedicated nail primer is crucial for the best results.
What Happens If You Don’t Use Nail Primer?
Without a nail primer, you’re basically rolling the dice on the longevity of your acrylic nails. You might get lucky and they’ll last for weeks, but chances are they’ll start lifting or cracking within days.
The reason is that primer helps create a strong bond between your natural nail and the acrylic.
Without it, the acrylic can separate from your nail, leading to a weak and fragile nail. You might also notice that your acrylic nails become more prone to lifting, especially around the cuticles.
This is because the acrylic isn’t adhering properly to your nail, causing it to lift and separate. Additionally, without primer, your nail technician may need to use more glue or other adhesives to get the acrylic to stick, which can be damaging to your natural nail.
Is Primer the Same as Dehydrator?
Now that you know the importance of using a nail primer, you might wonder if it’s the same as a dehydrator.
While both products are used in the preparation of your natural nail for acrylics, they serve different purposes. A dehydrator is a product that removes oils and moisture from your nail plate, creating a surface that’s ideal for the acrylic application.
It helps the acrylic adhere better to your natural nail. On the other hand, a nail primer is a special type of adhesive that’s applied to your natural nail before applying acrylics.
It helps create a strong bond between your natural nail and the acrylic, ensuring that your acrylic nails last longer. Think of it this way: a dehydrator prepares the surface, while a primer creates the bond.
You need both to achieve a strong and long-lasting acrylic nail application. Using a dehydrator without a primer may lead to poor adhesion, and using a primer without a dehydrator may not provide the best surface for the acrylic to adhere to.
How to Use Primer for Acrylic Nails? Step-to- Step Guide
You’re ready to move on to the most crucial part of the process: applying the primer. Here’s how to do it like a pro;
- Before you do, make sure your nails are clean and dry, free of oils and lotions.
- Remove any old nail polish and push back your cuticles.
- Now, take a lint-free wipe or cotton ball and apply a small amount of primer to it. Gently wipe the primer onto your nail surface, making sure to cover the entire area.
- Focus on the center of your nail and work your way outwards in smooth, even strokes.
- Don’t overload the primer, as this can cause it to pool at the cuticles.
- Once you’ve applied the primer, let it dry completely before moving on to the next step.
- This usually takes about 30 seconds to a minute, depending on the brand and type of primer you’re using.
- If you’re unsure, refer to the instructions on the packaging.
- After the primer is dry, you’re ready to apply your acrylic nail tips or forms.
- Remember to work in a well-ventilated area and use a nail lamp to help the primer dry faster.
Are Gel and Acrylic Primer the Same?
Your primer of choice is about to play a crucial role in the success of your acrylic nail application, but have you ever wondered if the primer you’re using is specifically designed for acrylic nails or if it can also be used for gel nail applications?
The short answer is no, gel and acrylic primers aren’t the same.
While they may share some similarities, they’re formulated to cater to the unique needs of each type of nail application. Acrylic primers are designed to help the acrylic adhere to your natural nail, creating a strong bond that lasts.
Gel primers, on the other hand, are meant to help the gel polish adhere to the nail plate, providing a smooth surface for the gel to bond to.
Using a gel primer for acrylics can lead to a weak bond, causing the acrylic to lift or crack. When shopping for a primer, make sure to choose one specifically labeled as an acrylic primer.
This guarantees you’re getting a product that’s tailored to your needs, giving you the best possible results for your acrylic nail application.
What Can I Do If I Don’t Have Acrylic Primer?
In a pinch, you find yourself without an acrylic primer – what’s next?
Don’t panic! You’ve got a few options to salvage your nail game. First, you can use a dehydrator or a nail cleanser to clean and prep your nails.
This won’t provide the same benefits as a primer, but it’ll help your acrylic adhere better. Another option is to use a clear topcoat or a nail glue as a makeshift primer.
These products won’t provide the same bonding properties, but they can help your acrylic stick.
Keep in mind that the results mightn’t be as long-lasting or durable as using an actual primer. If you’re short on time, you can also use a combination of acetone and water to gently clean and etch the surface of your nail.
This will help the acrylic adhere, but be careful not to overdo it, as it can dry out your nails.
Conclusion
In conclusion, nail primer is a crucial step in the acrylic nail application process, ensuring a long-lasting and durable finish.
It cleans and degreases the nail surface, removes oils and residue, and creates a rough texture for the acrylic to bond to.
Skipping primer can lead to poor adhesion and nail damage. Remember to use a dedicated acrylic primer, not base coat or dehydrator, and follow the simple steps for a successful application.